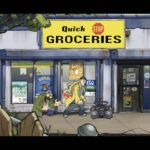

Jay and Silent Bob OUT TODAY 4/20
Yes folks Jay and Silent Bob Chronic Blunt Punch is out!! I play the game using Crossover on the Mac...

Yes folks Jay and Silent Bob Chronic Blunt Punch is out!! I play the game using Crossover on the Mac...
Also picked up Pragmata due to the fact the Sci-Fi looked very deep and hell it’s by CAPCOM (Captain Commando...
Just picked up this long awaited game! I’ve made a video while playing using CROSSOVER. I will add my info...
Hello out there! I wanted to give an update on the rebuild of the site. I’m slowly starting to populate...
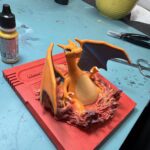
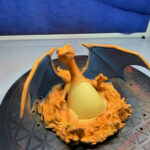
I’m very proud of this piece as 85% was done all with airbrush. Possibly more than that number. I had...